How-to:
Make Your Own Tiny Jumprings
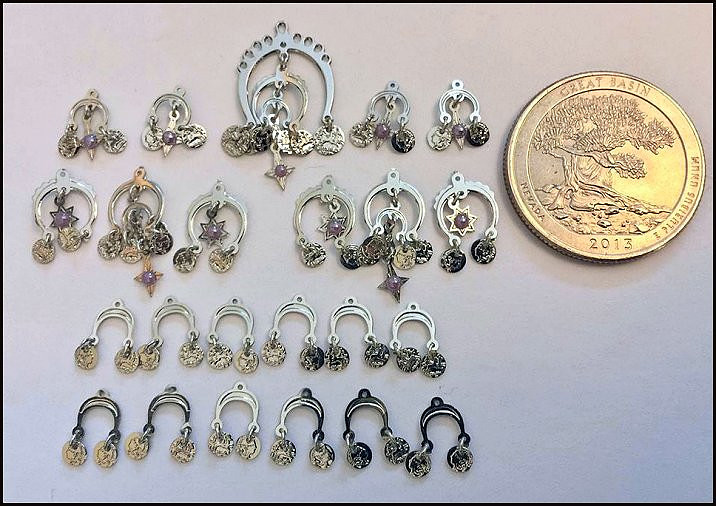

(Photo above shows an example of some hand-made jump rings put to good use!)
At some point while making miniature Arabian tack or maybe even some other kinds of tack you will probably run into the issue of trying to hang or attach a piece with a tiny jumpring only to have it catch at the hole. This often happens to me when I'm putting Rio Rondo charms on the nose chains of halters or working with Arabian horse jewelry. I will take the tiniest jumprings I have purchased and still find the need to ream holes out of those charms with my beading reamer, because the jumprings won't thread through. This can be a frustrating, time consuming process. The other thing I run into is most times my favorite tiny jumprings are a little too big for some of these pieces and in order to get the most "in-scale" look, I should be using a smaller size.
What I have come up with for myself is I prefer to make my own tiny jumprings. There are several things I like about using these: 1) I have yet to come across a situation where they won't go through any of the Rio Rondo hardware I use. 2) They are more cost efficient to make yourself 3) I can make them in a size and gauge that is nearly impossible to find for an affordable price.
If you're going to be stringing a lot of charms I recommend giving this a try, it's pretty easy once you get the hang of it. It does take a little practice to get it down. I've found that I can do about 50 of these in 20 minutes.
Let's get to it!
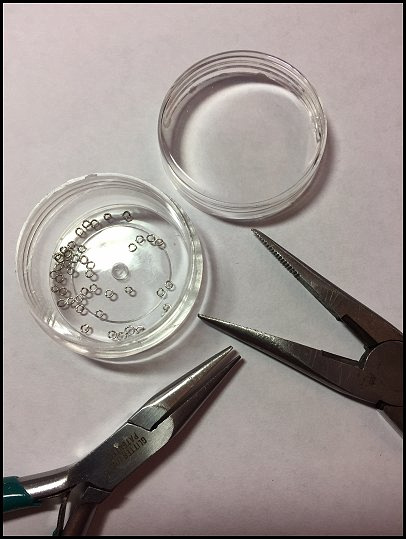
Supplies:
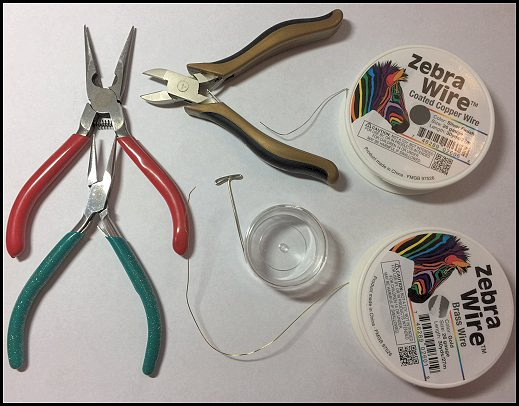
1) Two pairs of small needle nose pliers (whatever you prefer)
2) Wire cutter
3) T-pin
4) Small container (I use small bead containers)
5) 26 gauge wire in silver or gold
For pliers use something small, preferably designed for jewelry making. This is a look at my most favorite pliers in the entire world! They are small, lightweight and have teeth.
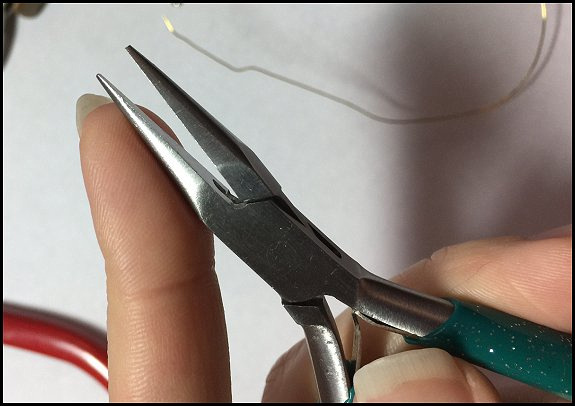
This is my second favorite pliers in the world. These aren't anything too special. They are slightly smaller than my red pair and these don't have the teeth. Sometimes when using two pliers at once I find that these will slip, however I put up with it because at times I need the smooth surface verus the teeth. You don't have to use the same kind of pliers I'm using here, just make sure you have two pairs and stick to what works best for you!
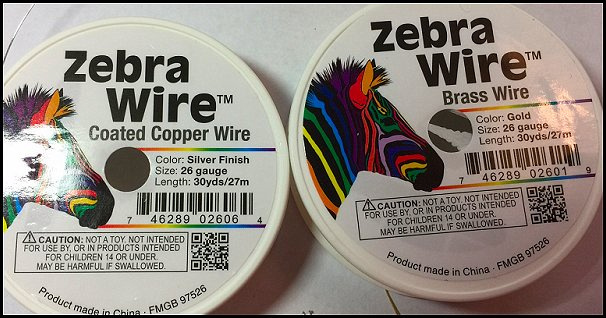
This is the wire I'm using. This is a 26 gauge "Zebra Wire" that I've purchased from Fire Mountain Gems. http://www.firemountaingems.com If you've never visited this website, do it! You can spend hours on there looking at all the stuff they have, it's amazing! Back to the wire...this wire is a jewelry making wire and I bought it because it has a finish on it that is supposed to be more tarnish resistant. It is important that anytime you are buying metals for your work that you try to buy quality stuff because most jewelry making metals, in my experience, will inevitably tarnish with time. You will give your piece more life if you don't skimp on your quality. Silver finishes are most challenging. Anything that is silver plated, or sterling will darken with age, I've found this to be true with the gold plate items as well. It is rarely possible to get these items in a finish that will stand the test of time so keep that in mind!
The gauge of the wire is very important here. I'm making jump rings here that end up being about 2mm in size. 26 gauge is a lot thinner and smaller than most jump rings out there that you can buy. A lot of the smallest jump rings are 22-24 gauge and that often ends up being just a touch too thick to be consistently convenient for the small stuff. However, different sizes and gauges of jumprings come in handy for different things. Larger gauge jump rings, and larger sizes can make a connection more secure because they are stronger. So these little ones I'm showing you how to make are more for detail-type work, but I don't recommend them for everything you do! Once you've worked with a wire a little you will see what I mean, this wire is soft and can't bear a lot of weight or tension.
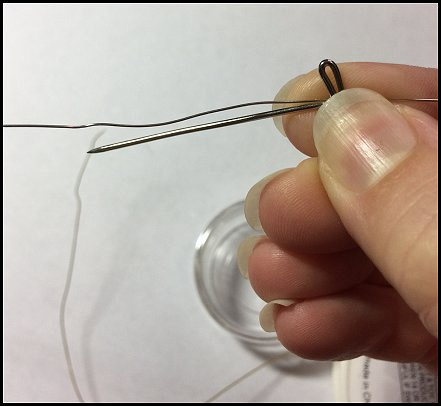
Start by cutting a piece of wire to about 12 inches in length. Grab your T-pin and hold the wire and pin head between your fingers.
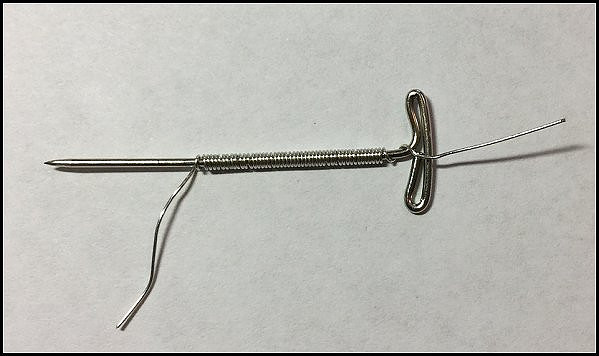
While holding the wire and pin snug in your fingers wrap the wire into a tight coil down the length of the pin until you run out of wire. I wrap until it's no longer comfortable. It is okay to have a tail hanging up at the end.
Silde your coil off your T-pin.
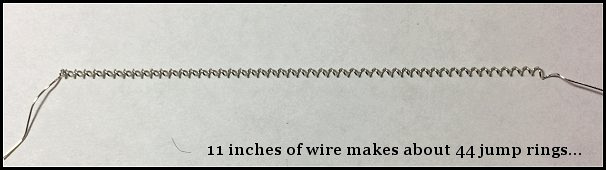
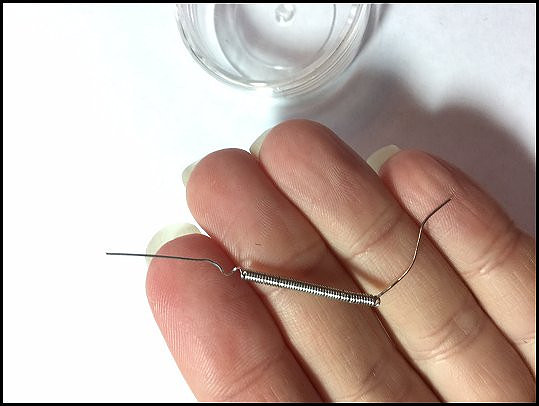
Gently pull your coil apart trying to keep it as evenly spaced as possible. When I do this I hook a fingernail into the outermost coils on either side and just pull. Get the coils about 1/8 inch apart. You won't want these pulled too far apart, but far enough that your wire cutter can get in between the coils to cut the rings.

Cut one end off your coil like this to get your rings started. Hold your coil vertically and look at where your first cut is. To make your first jump ring, you'll want to aim your next cut just below your last cut mark, but slightly beyond. I find that by going slightly beyond instead of exactly below allows me to close the ring more easily instead of having to pull it outward and then close it, or having to push it in if it end up with a gap.
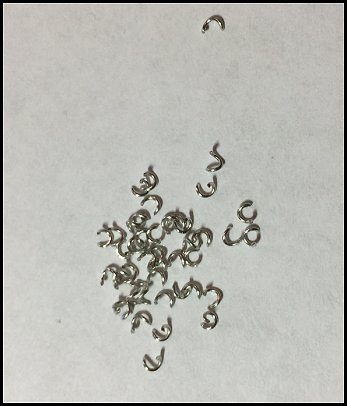
Cut each ring like this one at a time. Pause as you cut each one and let it fall into a little pile in front of you. Another thing I found helpful by accident while making this tutorial is I've got just a plain white piece of paper down while I'm working. These are much easier to see on that white surface!
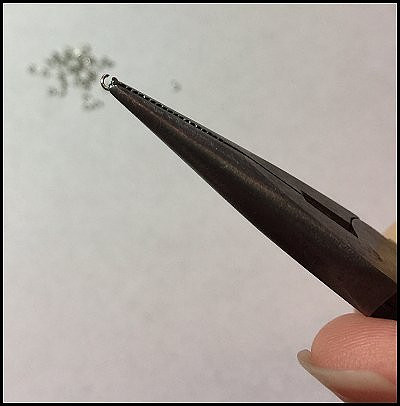
Once you have cut all your rings pick one up with a pliers on one side like this. We are now going to close the rings. For this part pick up a pliers in each hand and gently twist the jump ring together. I then like to take and give the top a little pinch horizontally pinching the ends together a bit, and then I go vertically up and down and give a little pinch to smooth down any sharp pointy parts sticking up. Getting the cut and the closing of the rings just right might take a little practice. Don't be discouraged if when you first start out that 1 in 3 of these turns into a dud, just keep making batches to practice and soon you'll be cranking these suckers out without even thinking! Use very gentle pressure when handling these, 26 gauge wire is very soft and doesn't need a lot of force to be molded into shape!
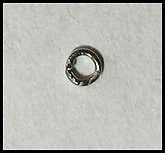
Here's what a finished ring looks like. These end up being about 2mm in size. This close-up you can see one of my little "crimp" marks in the ring from pinching the ends flush together.

If you have any rings that end up kitty-wopus in shape take and lay them in a flat pliers or a toothless spot on your pliers and give them a press to flatten them out.
I like to store these in a little beading container. I drop them in there as I close them! I've figured out that I can make about 50 of these in 20 minutes. The coil I made for this demo was about 11 inches in length and made 44 jump rings. I imagine that going a whole 12 inches would easily give you 50 or more rings per coil.
This is busy work! It's something great to do in front of the TV or while listening to your favorite music. Make a couple batches up and store them so that when you get to the fun part of your work you can just grab them and put your work together!
I hope you've enjoyed this tutorial! Feel free to drop me an email with any questions or suggestions on future tutorials! Also sign the guestbook if you would like and let me know what you think!
Thanks For Reading & Happy Collecting Everyone!
Missy Halvas :0)
[email protected]
