Bead Tied Tassels
for "Mane Beauty" Arabian Halter


Supplies
DMC Floss color 3845
Size 6/0 silver glass beads
Scissors
Cup of water
Ruler
6mm Jump Rings
Wire Cutter
Pliers
Tassels
1) Cut 2 pieces of embroidery floss to 14 inches in length and set aside.

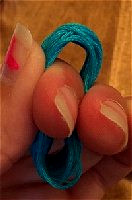
2) In this tutorial we are going to make 12 tassels. The next thread we cut is for the tassels. Each tassel will be 4 strands of embroidery floss thick. To make 12 we will wrap our thread around 3 fingers 24 times (all the way around) creating a total of 48 little pieces once they are cut. To cut the thread, cut your bundle on the top of your pointer finger, and below your middle finger to create a little bundle. You may need to carefully slide a finger out before cutting your threads to make some room.


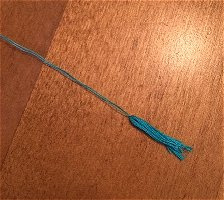
3) Pull one thread free from one of your 14 inch embroidery floss pieces. Lay it across the table in front of you. Place 4 strands of floss from your mini bundle over the middle. Double knot your long piece of single thread around the middle of the bundle. Once the knot is secure pull your strings up with one hand and give your threads a pinch and roll down into place. If you've done this correctly this is essentially a non-tied tassel with a pair of threads trailing from it.


4) Repeat these steps for the remaining 11 tassels.

5) Gather your pile of pre-tied tassels together, pull the thread ends straight and trim the ends straight across.

6) Pour out some size 6/0 silver glass beads into a small dish. I recommend hand-picking from your pile of beads for the nicest, most even looking, uniform beads as you go. Look for beads that have nice solid large holes in them for easy threading.

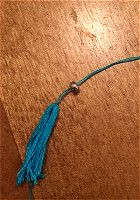
7) Pick up a tassel, wet your thread ends and slide a bead over both threads. Gently force the bead down over the tassel. It helps to pinch and roll your fingers over the knotted part to smoosh the tassel down before pulling a bead over the top. Slide your bead down about 3/8 inch and stop. You just tied a tassel with a bead!

8) Repeat for all remaining tassels. Try to get your beads evenly lined up from tassel to tassel. If you accidentally snap a thread don't lose heart, just cut a new piece of thread, re-tie and try a different bead. If you come across a tassel where you feel you are having to pull very hard, also try a different bead.

9) Put away your excess beads. Fill a small cup with water. It's time to trim our tassels to the right size!
10) Take 1 tassel, and dunk the ends in your cup of water to dampen the threads. Pinch your tassel into place to help it soak up enough water. Cut the tassel straight across as evenly as you can to your desired length. Make sure you use a nice, sharp scissor.


11) Use the first tassel you cut as a guide for cutting your other tassels. Try to make them all the same size. Dampen each one with water as you go to get nice even cuts. Set them aside to dry.

Jump-ring Tassels
1) Take a small split jump ring (6mm) and cut it right at the split with a wire cutter. This will create 2 rings. You may also use regular jump rings which are much easier to handle, if you can find them at your local craft store, then you don't have to cut the rings.


2) Using a pliers in each hand carefully close the gap on each jump ring.
3) Tie 2 more tassels with silver beads following the same steps above for making tassels. Cut them to the correct size and let dry.
4) Now we will slide each tassel onto a jump ring. To do this use your pliers to open the rings. Press down on the top of a tassel to find the center hole (follow the path of the thread that you tied it with) and slide the jump ring through. Close the ring with your pliers. Carefully cut the stringing thread from the top of your tassel and pull it off. One tassel will decorate the chin chain of your halter and the second tassel can be used for an optional brow band piece!


