Tutorial #2:
How to make mini pom poms for model horse tack
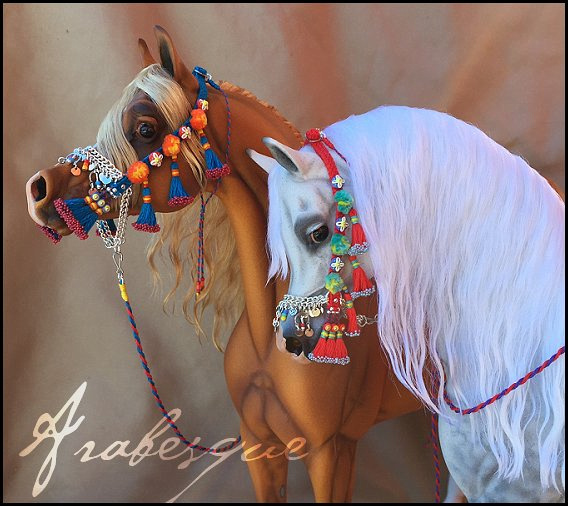

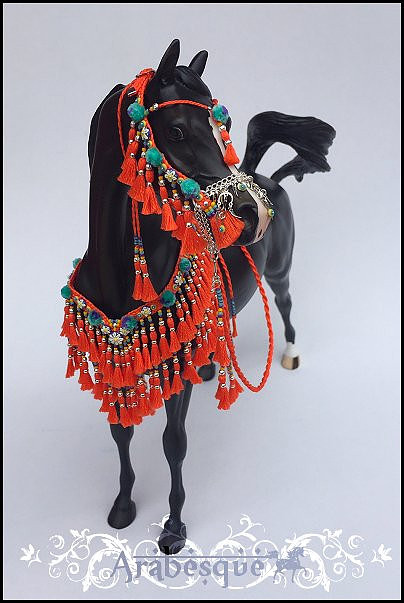
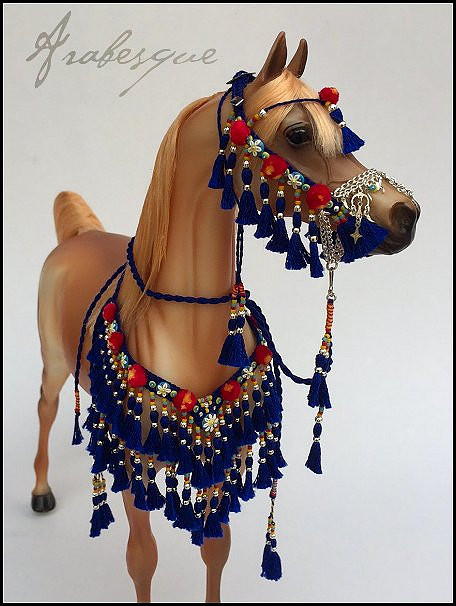
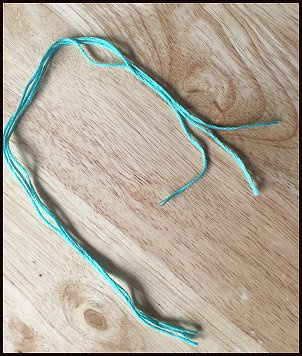
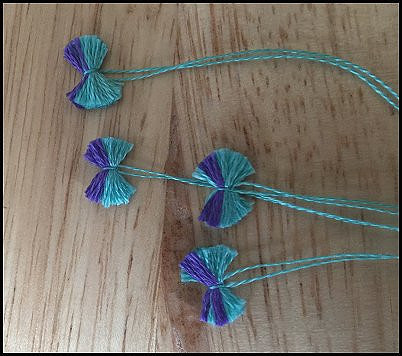
Pom Poms are incredibly popular on real Arabian horse tack! They can also be found on tack intended for other breeds, one that comes to mind instantly is Marwari as an example. What I'm going to show you today is an easy method that I've developed for making attractive multi-colored pom poms. Pictured above is just an example of some creations I've made using this technique!
Let's get started!
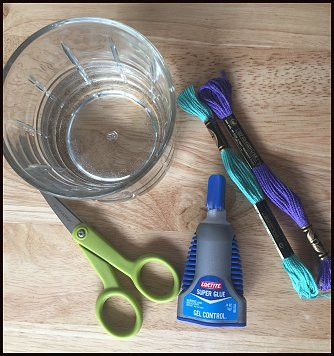
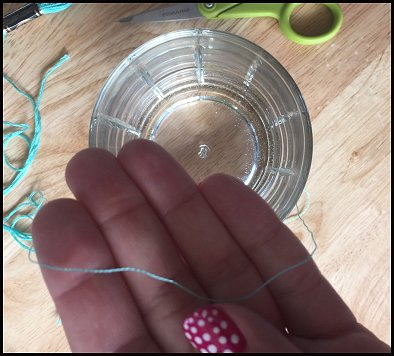
For supplies you will need embroidery floss, a nice sharp scissor, a cup of water, and some super glue. For super glue I prefer the "gel control" in the blue and gray bottle. I use this for nearly everything small in tack making that needs a tough, quick drying hold!
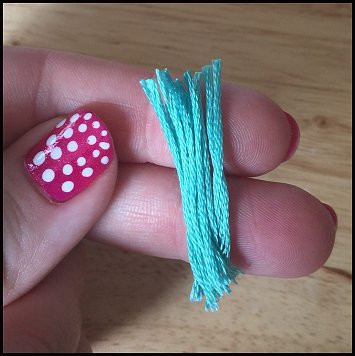
Decide how many pom poms you want to make and cut some embroidery floss into sections. These are roughly 8 inches long? Each section of embroidery floss has six tiny strands in it, and we will use individual strands to tie our pom poms. Here I've cut 3 strands because I'm going to make a big batch of pom poms. I tend to screw some of these up, or they don't come out as uniform as I like, so I will make a bunch and pick and choose which ones are the keepers at the end!
Here's my individual strand. To get it ready I dip my fingers in the water and wet the strand down to straighten it, then lay it down flat on my work surface.
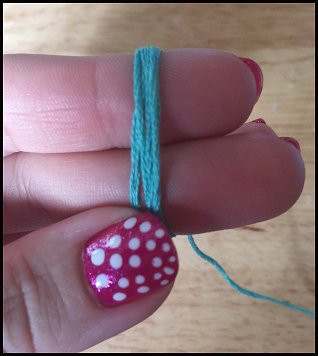
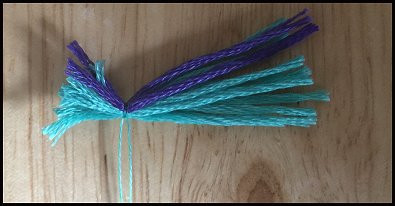
Determine what color or colors your pom poms will be. For mine I am doing a mint-y turquoise and purple mix. Mine will have purple centers, and the turquoise color will be the outside color. I will need more of the outside color and I'm going to cut that first. For this part I wrap embroidery floss around two fingers 6 times to make 12 pieces. (This wrapping over two fingers is also the same method I use for tassels)
Slide your fingers out and snip the threads at the top and bottom to make your stack of threads.
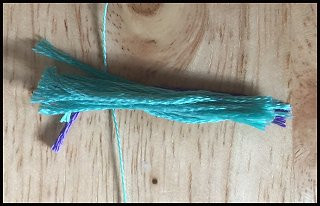
So here is my stack of 12, in this case the "outside" color.

For the inside color I just use 2 pieces of purple.
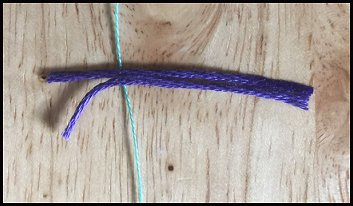
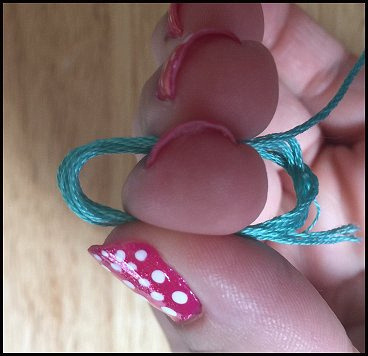
First lay your center color down over your thread. Place it off to the side of the stack. What this will do is leave enough room to make two pom poms out of this stack. Next, lay your outside color over the top.
Double knot your thread and then pull both strands to the "bottom" of the stack, so your knot faces away from your center color.
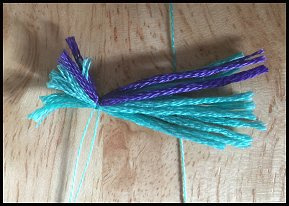
Repeat these steps on the other side of your stack to make it look kind of like a piece of candy!
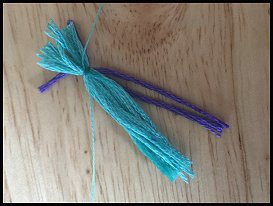
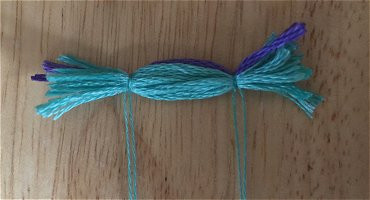
Cut on either side of your threads leaving a little fringe to either side. Now you have two pieces of candy!
I like to round my edges off a bit.

Now pull your string down between your thumb and pointer finger and gently start to squeeze the edges of your piece of candy together to get the shape forming. Take your super glue and put the tiniest dot of glue right in the center. You don't need very much. If you use too much it will ooze out the top and you will glue your fingers together....I've done this!
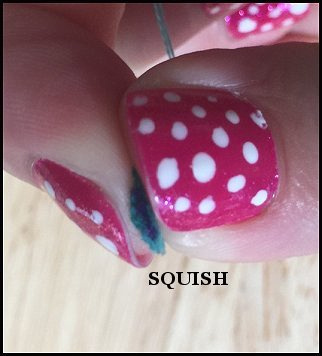
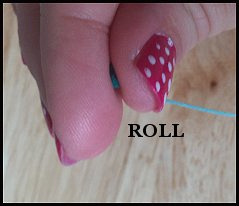
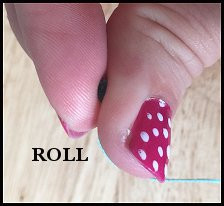
Now squish! And roll, roll, roll that pom pom into shape! Get that glue to set! It doesn't take long at all, that glue grabs pretty instantly and then you're able to start trimming. Now pretend you are trimming a tiny hedge and trim, trim trim your little bush!
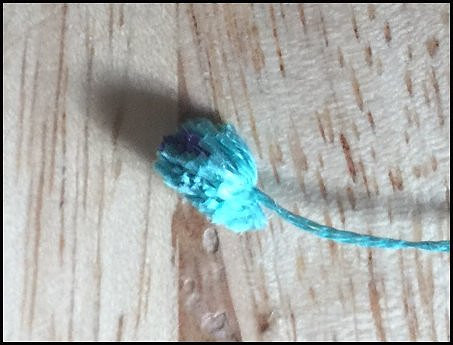
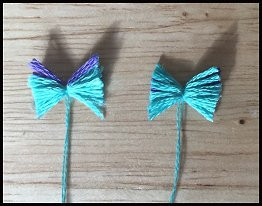
Here you can see I trimmed at a sharp angle.
Cut straight across the top and poke the pom pom down with your finger. There really is no right or wrong method to trimming these down. Figure out what works best for you. You can make these smaller if you want. I should note that for the ones I've been making, I've been doing them about the width of my headstalls on my native halters.
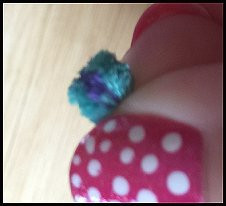
Cute aren't they? It takes practice to get these how you want. I recommend doing a big batch for fun and pick your favorites to put on your tack. Also getting the mix of colors just right is tricky. As you can see in this second photo that purple goes wherever it feels like. Can you see using even more colors, or just one color? Making them even smaller and cuter? See what you can do, and feel free to show me!
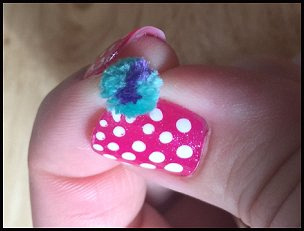
For attaching I recommend gluing them onto your tack. I thread them through a needle first, and pull the needle through my work to get them placed where I want them. Then I take a small dot of super glue on the bottom of the knot and using the threads I pull the pom pom into place until it set. I then sew and knot those threads into place a back up so these little buggers will never come off!
And because while working with this color combination I couldn't think of anything but Sulley from the movie "Monster's Inc."....

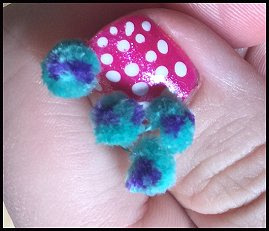
I hope you found this tutorial helpful! Let me know what you think by commenting on the blog or drop me an email! Let me know what other tutorials you would like to see! Below I've shared more examples of native tack I've made using this technique!
Melissa Halvas :0)