Tutorial: How-To Make Basic Cowries For Model Horse Scale Native Arabian TackTutorial #3: How-To Make Basic Cowries For Model Horse Scale Native Arabian Tack!
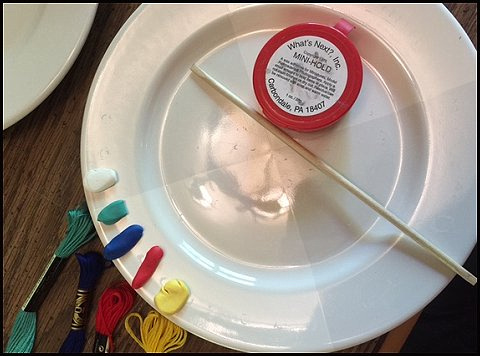
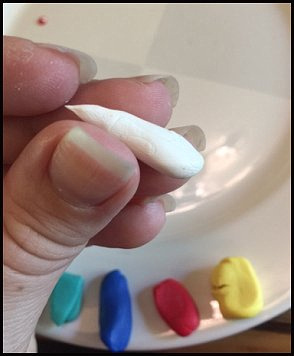
In this week's tutorial I will show you how to make a basic model horse scale cowrie design for native Arabian tack. The nice thing about mastering this basic design is you can do so much with it. I promise if you give this a try, you will figure out how to do even more with this all by yourself! I think just about every Arabian tack maker develops their own method of doing this with time. I don't claim to be the best at it, but I have done it A LOT! (...TOO MUCH...) Cowries are actually what I consider the *groan* part of tack making but they are a necessary icing on an Arabian cake, therefore like usual, I'm going to ask you to get your patience out for this and no matter what remember that *it's fun*!!! A few basic things before we get started. I typically use Sculpey clay for my cowries, it is an oven bake clay that comes in many many beautiful colors. The colors you will need to get started depend on your project, however if you're going to start a stash I recommend grabbing the basics. Get your primary colors: blue, yellow, red, black, white... You can mix these colors just like you would paints to get custom colors so if you can't find a color you need don't worry--you can make it! For those unfamiliar with Sculpey, it a lovely thing! One of the main reasons it's so lovely? It lasts forever! I'm not kidding...years and years without drying out. I've never thrown Sculpey away, and I don't think I've ever had to buy more than one block of the same color either. For a work surface to bake my clay on, I prefer to use a glass plate that is bake-able in the oven. I think most dinner plates can tolerate this but be careful. Mine happens to be white and is actually something I rescued from the garbage of all places!
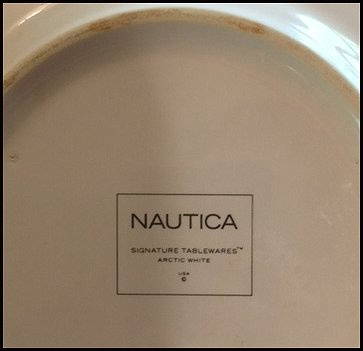
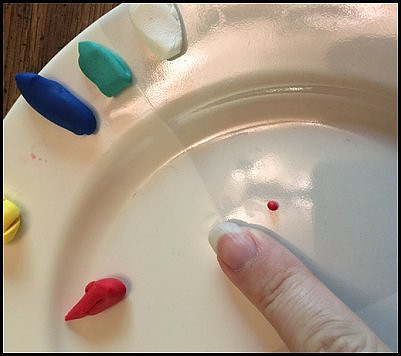
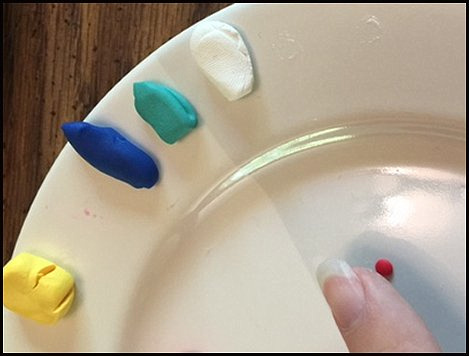
In the first photo you can see my glass plate with my mixed up colors. I matched these colors to the embroidery floss that I used on my presentation set that these cowries will be for. The second photo is just a picture of the bottom of my plate to show you what it is. I don't think it's anything super special. One thing I like about having a solid white plate to work on is it's a clean "non-busy" surface to create on, almost like a blank sheet of paper. I can imagine if I had a loudly decorated plate I would probably be distracted and get a headache...well, I usually get a headache anyway! MICROBEADS
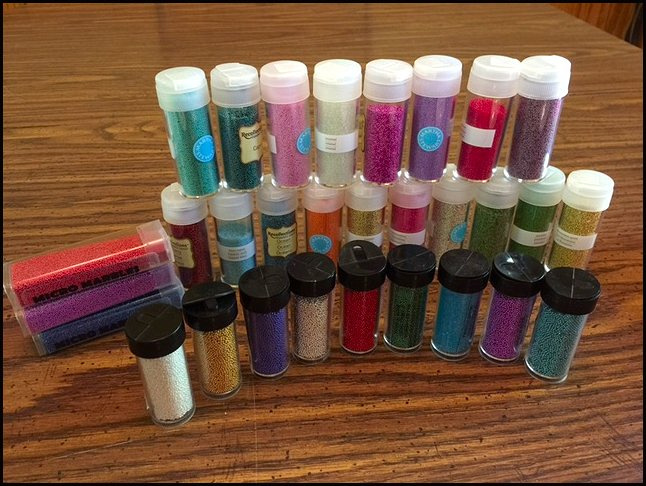
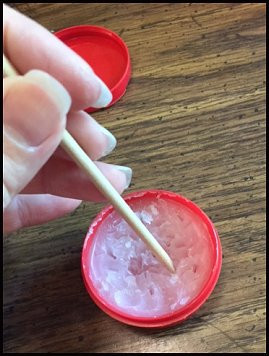
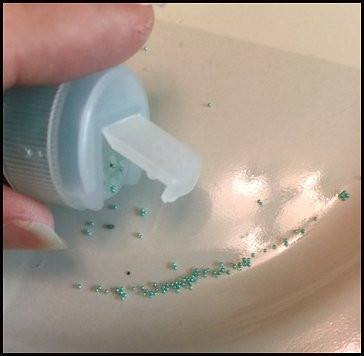
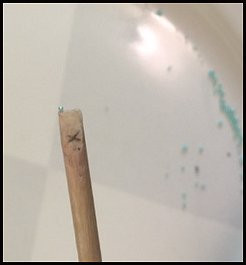
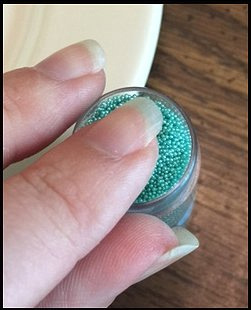
I would like to say a quick word about Microbeads. First of all, what they are very often used for, is to make the little bead/ball shapes on cowrie designs. They add a really nice touch of color and detail. As you can see I'm a bit of an addict, and here is a photo of part of my collection. I will never have too many as long as there is another color I find that I don't have. These are most commonly found in either a scrapbooking section of a craft store under "microbeads or micro marbles". They are also commonly used for fingernails and are known as a "caviar manicure". You can search these on ebay under "caviar beads for nails". They are also used for jewelry designs and can be found in jewelry supply sections of stores or online. There is a really nice starter kit of these that you can get from Michaels, it is the "Martha Stewart" brand but they come in like a pack of 18 tubes? I've also recently scored a few collections of tiny tubs on ebay in the nail section. Just do some searching and you will find them. They also come in different sizes. Some are very tiny and some are a little larger. If you plan to make these a lot try to find both sizes. Often times the bigger ones work nice as a center accent while the little ones fill in nicely around other areas. Continuing on then! Two of my favorite supplies for this project are a tub of a sticky wax that I purchased from Rio Rondo and a long wooden cuticle stick. A cuticle stick is something you find in a nail supply section. Each end of my stick has a flat edge to it. The tool you use isn't that important as long as it works for you, this just happens to be my favorite pick up tool no matter what I am making. I use one end of this stick to pick up tiny micro beads and the other end to tap them in place. So one end of my stick is marked with an X, that is my "sticky" end. The non-marked end is my not sticky end that I do not dip in the wax but use to tap objects into place as needed!
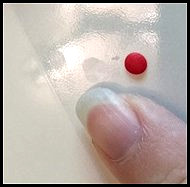
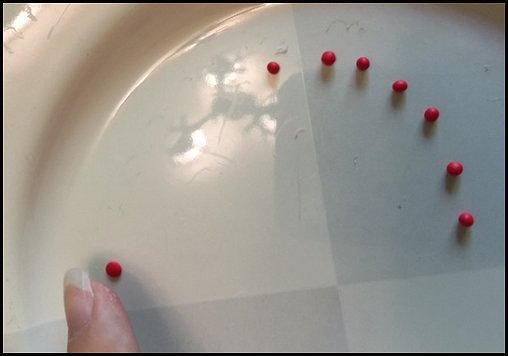
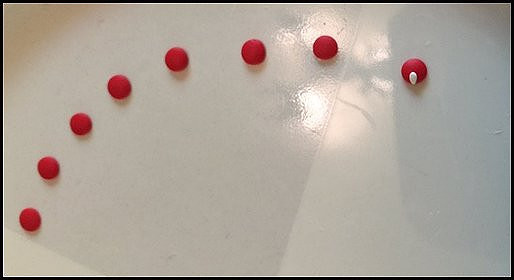
Step 1: Get started by getting your cowrie base color out and roll a small ball to get the approximate size your cowries should be.
Step 2: To test out the size of your ball gently tap the ball down into more of a flat circle. Use gentle movements when handling cowries. You don't want to leave your fingerprints all over your work!
I've decided this one is about the right size so I roll it back into a ball...
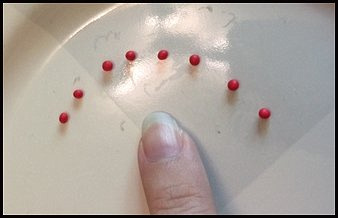
Then roll out several balls for however many cowries you want and try to make them as close to the size of the ball you originally made.
Once you get your sizing down roll one away and gently tap it into place with your finger. I like to work on a plate with my hand in center and my work on the outside of the plate headed in a circle. Makes for less of a chance of accidentally squishing one! If your clay will not stick to your plate take your white or lightest clay and rub it along the surface of the plate to make a greasy smear. I call this "seasoning" the plate, then you can get that clay to not stick to your finger and stick to the plate instead.
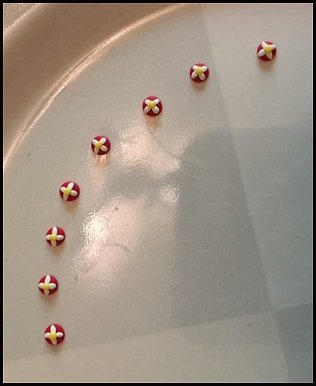
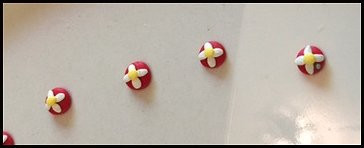
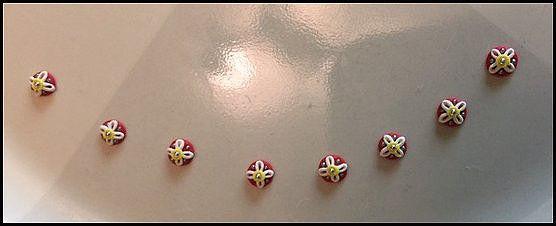
Tada! A nice row...
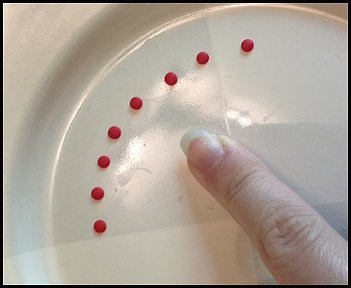
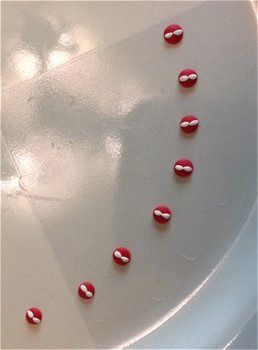
Step 2: Now you're going to make your actual cowries. Before you touch white clay make sure you wash your fingers thoroughly. Anytime I handle red or a darker color it never fails to transfer onto the white clay, and be ready if you handle red, it is the hardest color to get off your fingers! For the cowrie part I like to use straight white. I've tried flesh tone colors, even more see-through varieties of clay and the plain white shows the detail the best so far in my opinion, so for me I like to use white. I take and pinch one end of the clay down nice and pointy!
Then gently roll out the tiniest little oval shape. This may take some practice and several attempts to get each one the right size. Go as small as you can. Think about my little red circles as a base for a flower, and the cowries are the petals. I need to fit four petals onto my base so I don't want them too big, or hanging off the edges.
Now you can see I've gotten one laid down on there. And I go around to each cowrie and give each one a first petal...
Each one has a first petal....
Then go directly across from your first petal on each one turning your plate as you do and lay down your second petals...
Then halfway between the first two to make a third petal, and finally your fourth...
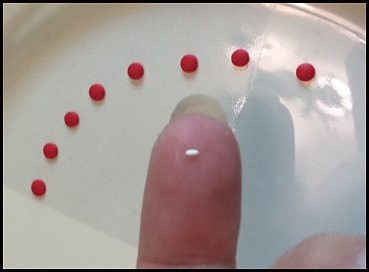
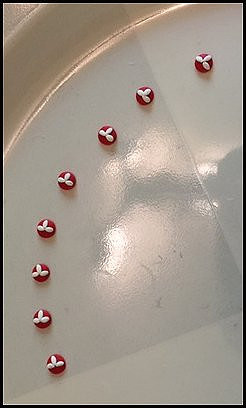
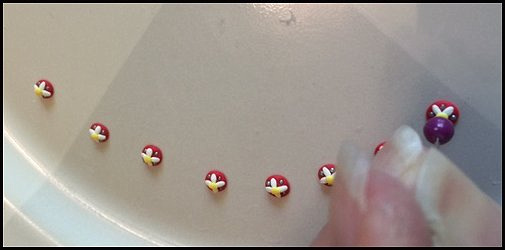
Step 3: Pick out a center color. Another tip here that I will point out is if you plan to use yellow in your design try to do it in clay. Maybe you'll have better luck that me but I have never had any luck finding yellow so I almost always incorporate it into my designs with clay instead of microbeads. Once you pick out your center color, just roll out tiny little balls and set them right into the centers of your little cowrie flowers. Mine look like daisies!
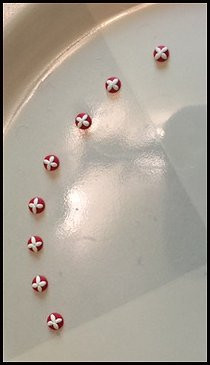
Step 4: Next you will want to set your microbeads into your design. I take and get one end of my stick a bit tacky by tapping it into my wax. Don't use to much that you get your beads gunky, the perfect amount of stickiness is just when it will pick up a bead and hold it long enough for you to easily sink it into the clay. If your beads won't let go of your stick rub some off with your fingers. I use an additional plate I have and just dump some little beads onto it, sometimes a paper plate or even a plastic lid to something works great for these!
Start by placing beads on the outside of your design, leave the center for last...
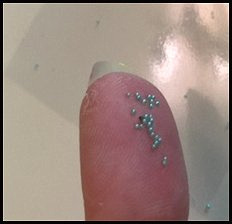
Here you can see I set my first bead in place. This is the part where I flip my stick over to the non-sticky side as I'm doing this and gently tap that bead down a bit and into place. You don't have to completely sink these into the clay, but you want them about halfway sunk to get them to stay. On your last step, sealing these will help the beads stay put.
There we go, there's all my outside beads in blue!
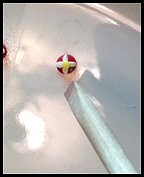
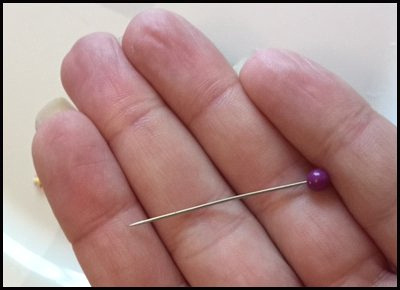
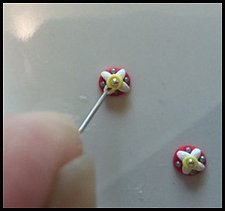
Step 5: For detailing I like to use a needle or a pin. This is just a basic sewing pin with a ball on the end of it. I like to take and just make a little "dapple" or divot into the center of each cowrie with it first. What this does is it will give that center bead a gentle ditch to rest in and it kind of pushes the cowrie petals together underneath your center clay color.
Just go through and tap each one until you give each one just a nice little dimple!
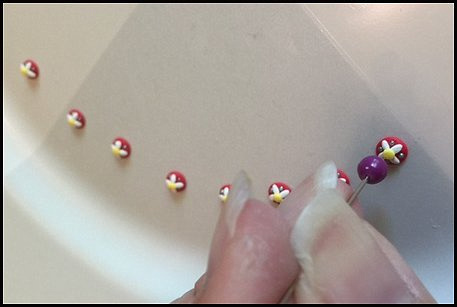
Before you switch colors you'll want to clean up your beads. The easiest way I find to clean these up is to use my finger. Just press down on them until they stick to your fingers and scrape them on the edge of your tub of beads to clean them up.
Step 6: Dump out your center color. For this set I'm using silver. And now I'm going to go along and just press a silver bead into each cowrie center, flipping my stick over to tap each one down into place before moving on to the next.
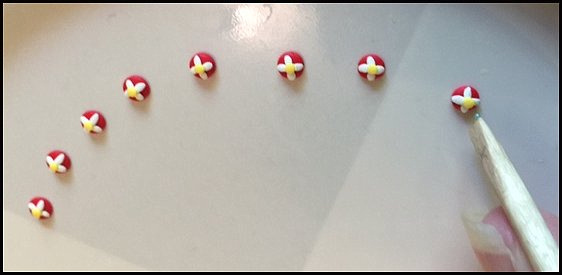
There they are, all beads are set and you're ready for some detailing!
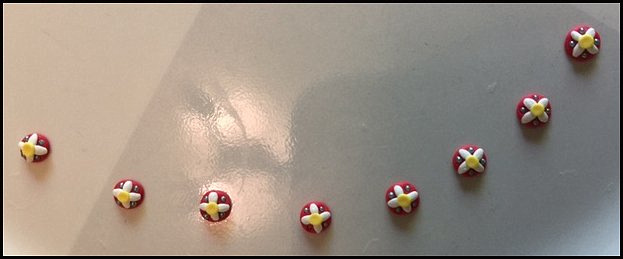
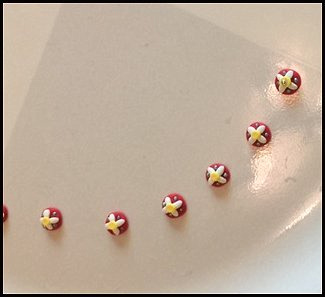
Step 7: For the detailing part I take my needle, holding it angled away from my work, and gently press each petal in the center to make the cowrie. You can get even more detailed here if you want by drawing in little "cowrie teeth" with your needle by holding it the other way. For this set I chose to keep them plain, sometimes when I make actual teeth, things get messy! Step 8: For baking these your temperatures may vary according to what kind of oven you have. I have just a regular electric Fridgidaire glass top oven. I preheat my oven to 275 degrees and bake my cowries for about 14 minutes. The thing with working with clay pieces this small is they don't need quite as long as a larger piece of clay would. You don't want to under bake them or they will crumble apart, and if you over bake them they will scorch and turn brown and you have every right to cry! I've done it a million times! Make sure you set a timer and do not let yourself get distracted while these are in the oven! I've done it so many times and probably still will in the future...
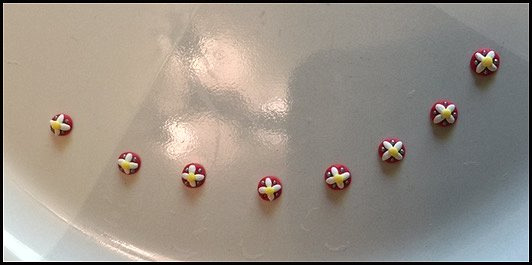
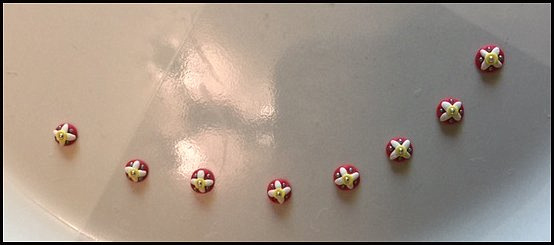
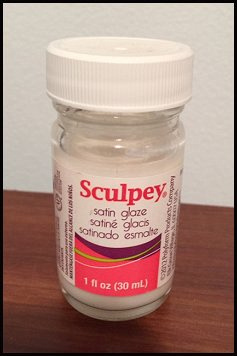
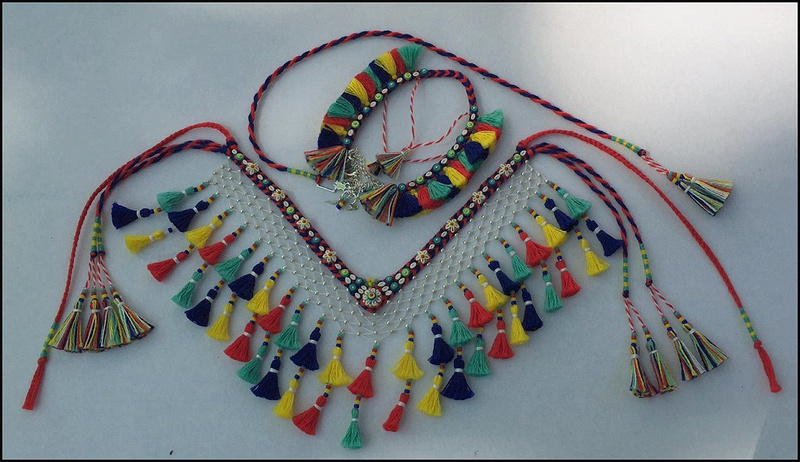
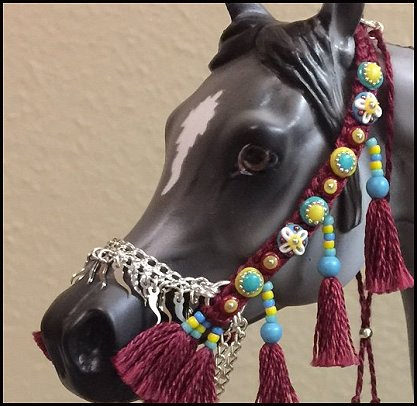
Step 9: Let your cowries cool completely, and then seal them. For sealer I've found it is best to stick with the Sculpey brand. This is the one I use. I just take a small paint brush and paint it on. Don't use too much or it can dry bubbly looking. Also don't be alarmed as you paint this onto your designs it will go on a milky color, but it does dry clear so just breathe! I didn't illustrate how this batch looked with the glaze because unfortunately this batch did not survive. The center bead color actually rubbed off to a plain clear bead color when I applied glaze...one of the many possible tragedies of cowrie making! Some people even take these before they seal and paint the centers of their cowries with a nude color to give them even more depth and realism! Try it out, do experiment, and find out what works best for you! And that's all there is to it! Once you get the hang of this clay you can make so many different variations of cowries for your tack! To glue them onto your work I recommend using super glue. My favorite is the "gel control" in the blue and gray bottle. This will get those little suckers to hold forever. I use my same pick up sticky stick to pick the cowries up and set them. I place a blob of glue on a paper plate or sticky note and use a toothpick to place dots of glue on my work, then set the cowries so I don't overuse the glue. I also recommend making extras of every set you make. You may have some that turn out better than others, and you may accidentally break a few while setting them or working on your tack. It's also a nice gesture if you're selling tack to make some extras to send along with the sales of your pieces in case something falls off or breaks. Below I've included a few examples of some that I've done...
I hope you've enjoyed this tutorial and find it helpful! Get to practicing and as soon as I can I will do another tutorial on some more possible design ideas to try on your work! As always thanks for reading and happy collecting everyone! Melissa Halvas :0) 
Comments
Jeff(non-registered)
great photos...love your work!
Jeff http://www.printradiant.com | http://www.printlinkage.com | http://www.hitsticker.com | http://www.stickermac.com
No comments posted.
Loading...
|