Tutorial #1:
How to make fringe for model horse tack

It occurred to me recently that there aren't many options for model scale fringe out there. I've heard from another tack maker who has worked with fringe quite a bit, that trying to find fringe in model scale is basically a search for vintage material. For someone like me who hasn't yet really played with fringe, this bummed me out. I had to find a way to make fringe for model horse tack, and this is what I came up with. I'm sharing my method in case others may find it helpful. This can be used on model horse saddles, blankets, collars, halters, brow bands, or even doll clothes. The sky is the limit and the best part? You can make it in just about any color that you want, any thickness that you want. All it will take is just a little patience. And if you are exploring the wonderful world of tack making or doll clothes, you should have plenty of that!
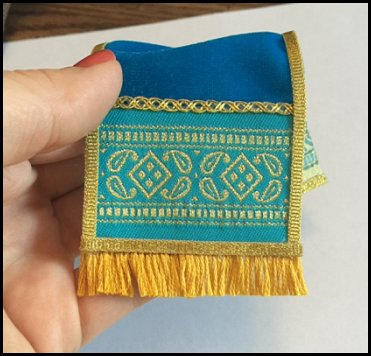
Okay, so in this tutorial I am adding trim to a model Arabian horse presentation blanket that I'm working on and I'm using DMC floss for the fringe.
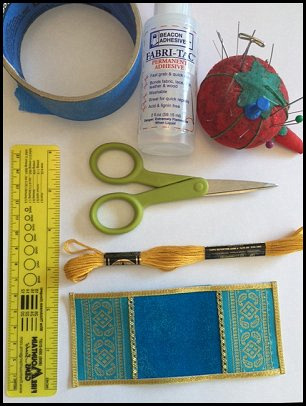
Supplies:
1. Tape (I use painters tape)
2. Glue (I use Fabri-tac)
3. Large needle
4. DMC Floss
5. Scissor
6. Ruler (optional)
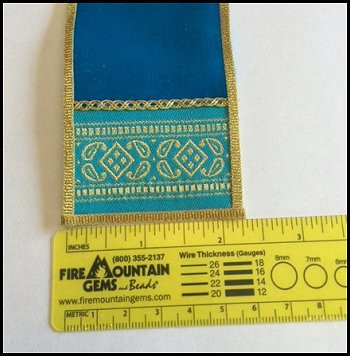
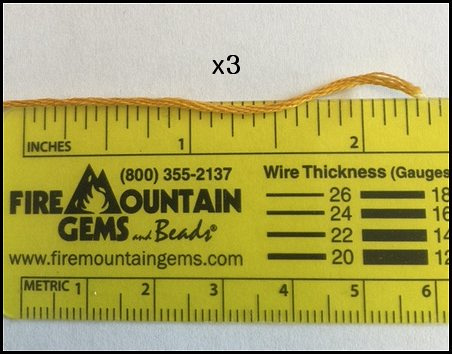
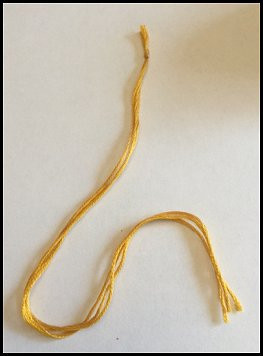
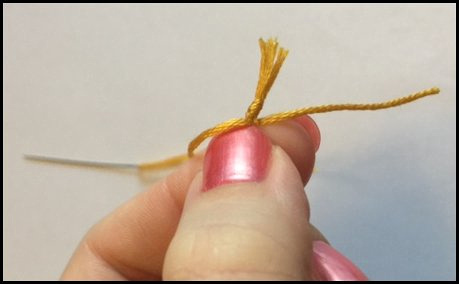
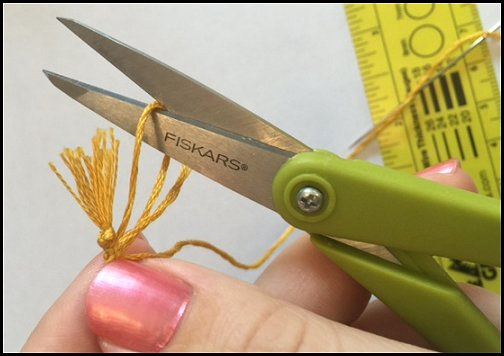
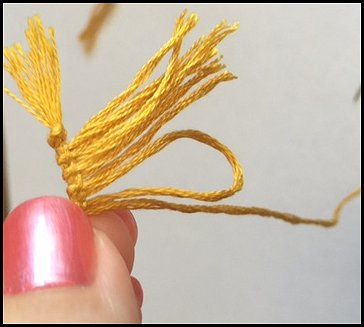
Figure out how much fringe you need by measuring the edge of your project. For this I'm measuring the edge of my blanket. A ruler is optional, you can just lay the thread along the edge and measure length that way. Since I have two sides of this blanket that will need fringe my length needs to be at least double, however I am a firm believer in always having more than enough material in front of you so I have tripled the original length to give me extra length to work with--it's just easier! This stuff is cheap so don't be afraid to have some wasted--it's better that than finding out you don't have enough length and have to start over. Cut 3 strands of embroidery floss to the length you need and put a knot in the end.
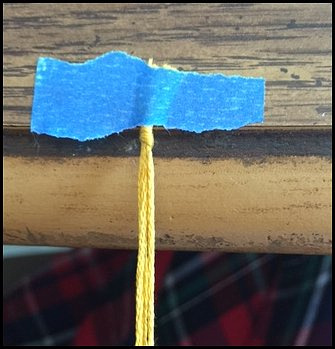
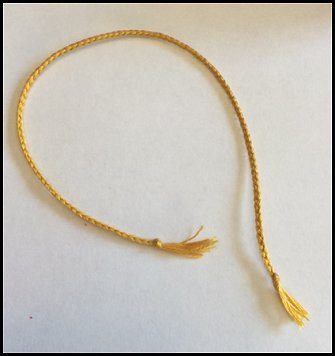
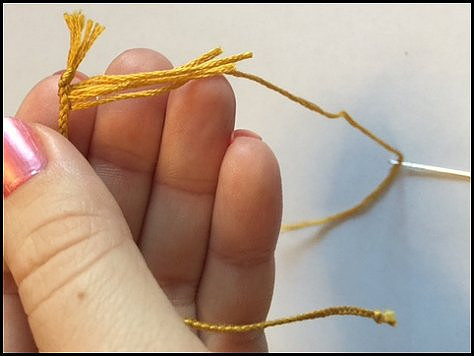
Tape your string to the edge of a table at the knotted end and do a nice semi loose braid. What I mean by "semi loose" is don't do one that is super tight, and don't do one that is saggy, just a nice easy tension braid that you can pull a giant needle through. Put a knot in the end of your braid.

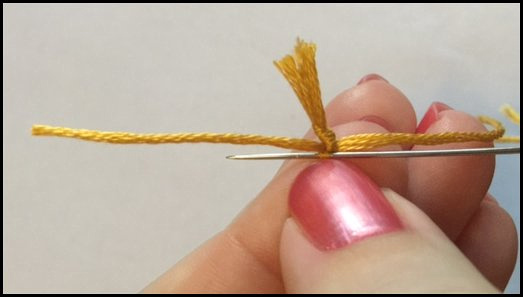
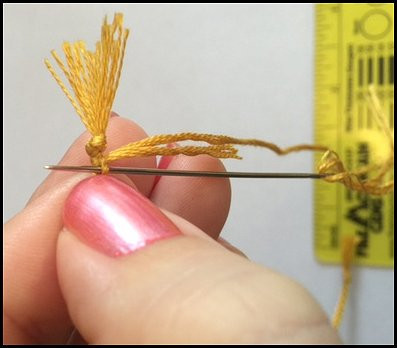
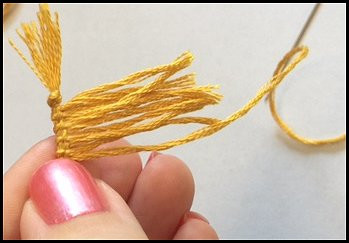
Cut a long piece of embroider floss and thread it through a large needle. The needle I'm using is quite large and easy to thread with embroidery floss. You will have to re-thread your needle multiple times through this process so find one that's easy for you to use.
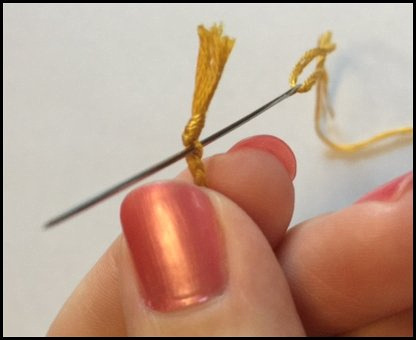
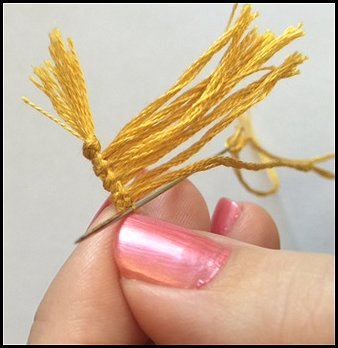
Start your needle by threading it through the side of your braid, down by the knot.
Pull your thread through until there is about an inch of thread left. This first thread you leave out is your the start of your fringe.
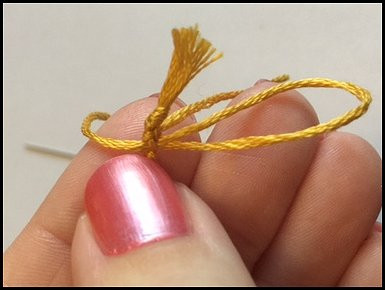
Flip your braid over and bring the needle through the bottom of the braid so that your thread comes out right next to your first free thread.
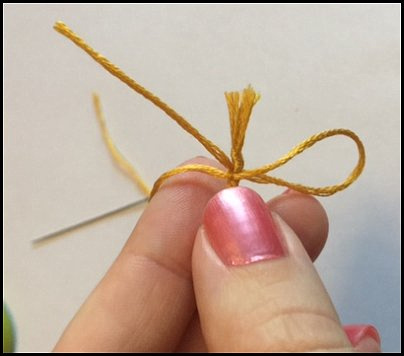
Pull the thread until that loop disappears, then flip your braid back over. You've got your second strand of fringe now.
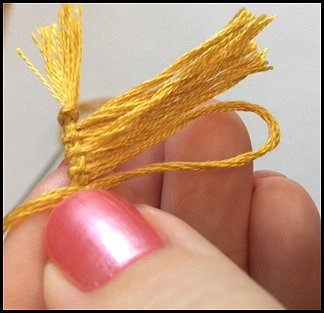
Bring your needle up through the side of the braid again like you did when you started, and pull it up until you have a loop about the same length as your threads.
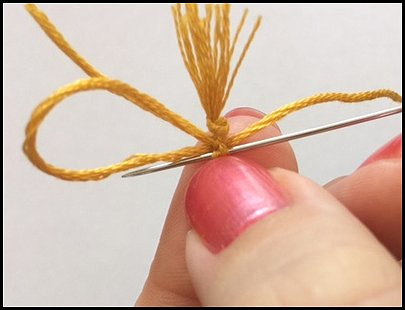
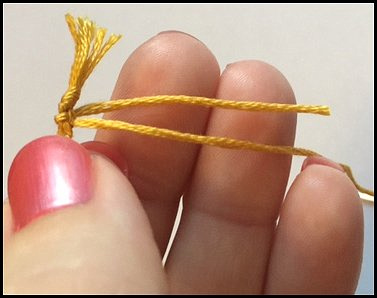
Flip your braid over again and bring your needle through the bottom of the braid so that your thread comes out right next to the loop.
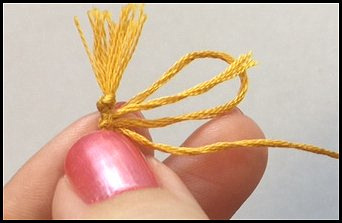
Flip your braid back over, and pull your thread all the way through until all your threads are on one side again creating our "fringe" effect. I recommend cutting the first loop at this point so that as you continue this pattern you are unable to accidentally pull on that loop.

Bring your needle up again to form another loop the same length as the rest of your threads then stop pulling. Flip your braid over and bring the thread down through the bottom to continue your fringe pattern.
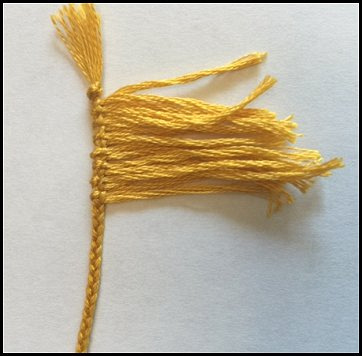
Pull tight then flip your braid back over. Cut your loop like you did before and continue with this up and down weave pattern until you get your fringe to the desired length you want. Essentially it is like you are making "U" shapes woven into the braid if that makes sense. These threads are not secure or knotted in any way. What makes them secure and permanent in the end is when you glue the trim down onto your project. For this reason I like to leave the fringe long until I get to that point to avoid accidentally pulling a thread out. If you run out of thread as you go (and you will) just make sure you end your thread on a fringe end (such as in the last photo) and cut it off. Cut another long thread and start it up again as you did at the beginning.
I've left my "working fringe" very long here as I go, you can save yourself some thread by doing this a little shorter. I'm just wasteful with my thread so for this project I kept it long and easy to work with.
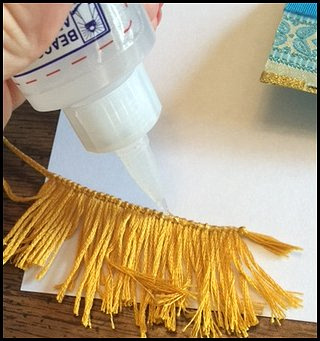
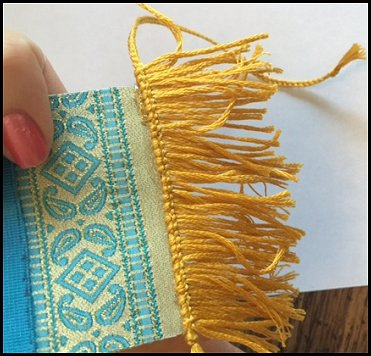
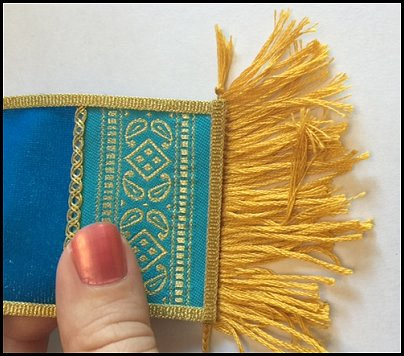
Once you get your trim to the length you need it go ahead and glue it down to the back side of your project. For this part I stopped making my trim once I got it long enough for one side of my blanket, and I will continue making the trim after I glue this part on. For glue I like to use Fabri-tac. It's a clear glue that I buy from JoAnn fabrics, but I think just about any craft store has this. It's a tacky, quick drying and really solid, just be careful because it can be a little string-y/glump-y/sticky to work with and thick, but the hold is worth it!
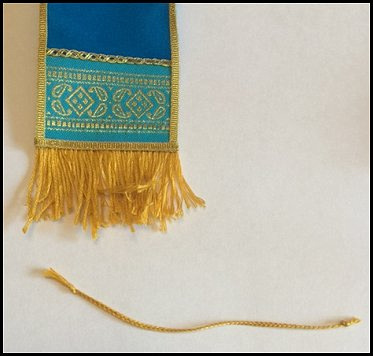
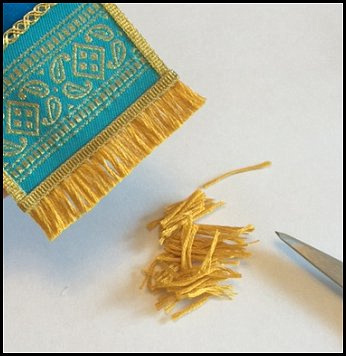
Trim the extra edges off your trim after you glue it down. Take your leftover piece and re-knot the end so you can continue your fringe making for the next piece. I then trimmed my fringe down shorter. I recommend waiting for your glue to dry completely and then you can re-trim your fringe by wetting it down to get a really nice precise cut along the length. Just get rid of the excess first so you don't have a ton of thread to wet down. I use a small cup of water and dip the fridge ends in it. Be careful not to wet the fringe up to the glued spot. You can even just wet your fingers and smooth the fringe down to get it damp enough to get a clean cut along that edge.
Hopefully now you have an idea of how you can utilize some fringe making in your own projects. Experiment with different kinds of thread, such a rayon to get a nice silky effect. Try mixing different colors together. Or try a thinner effect by pulling some threads out of your embroidery floss before threading your fringe. (Since there are six threads in a floss strand maybe try dividing your thread in half before you start "fringing" and you'll get a thinner effect.) These are just some additional ideas of various effects you could get by using this technique. Use this on model horse blankets, saddles, collars, headstalls, brow bands, or even doll clothes. The sky is the limit! If you have the patience and the creativity you can create anything!
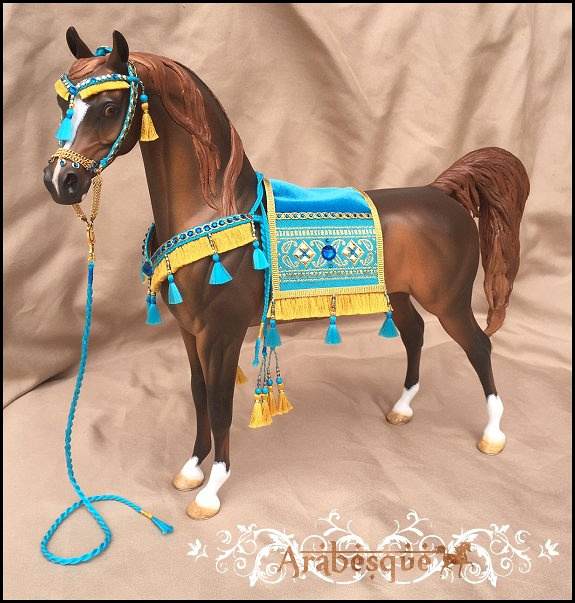
Here is a look at how the finished set turned out. I ended up doing more trimming to the blanket to get it more straight.
I hope you enjoyed this tutorial and found it helpful. Feel free to email me for your input, and let me know what future tutorials you would be interested in seeing!
Thanks for reading & happy collecting!
Melissa Halvas
